Working with Data Entry Objects
In PageFocus Pro, Forms are designed and created in PageFocus Pro and used in EXPO to enter data and to save the record/data. Data entry objects are
used to design fields to enter data and execute commands in EXPO. There are Entry Field object
, Equation Field object
, List Field object
, Button
object
, Table object
for you to build forms and applications. Each Data Entry Object has
it's unique object name which is used for Command and Data links. List of Commands are used to define the fields. The data_entry_object.olb in the Sample
Object Library provides easy access to these Data Entry objects.
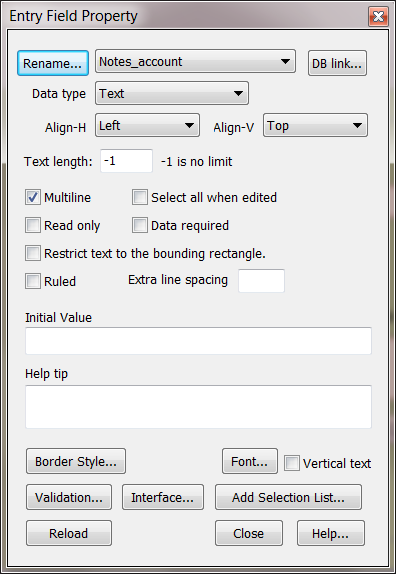
Entry fields can be set for date, time, number, text, and freehand for signing signature. Entry Field Property dialog box lets you select the data type. See
Data Typ. Use DB link button to link to a database and Interface to enter commands. In EXPO, these commands will be executed when you exit the field. If
you have a field such as fullname that will be repeatedly used in the following pages in a multi-page file. Use Entry Reference
from the More Objects
to create the object. Data entered in the fullname field will be automatically filled the Entry Reference object.
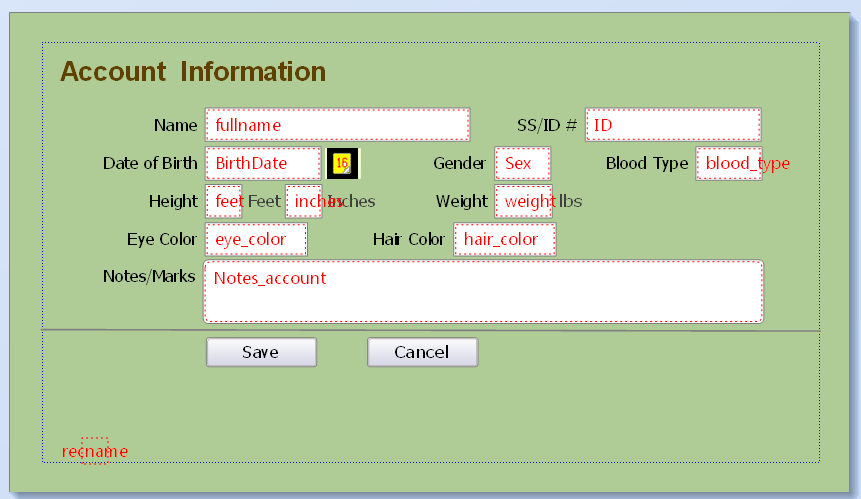
The followings are illustrations of how to use Entry field, List field and Button objects in designing "Account Information" form. In EXPO, open the form and
enter the data, create a database(account_info.xdb) to save the record. The database will be available to be linked in Entry Field or Button objects.
Entry Field
Select Entry Field object to open the Entry Field dialog box and enter fullname as the field name. Select Close to create the Full Name field. Select Field/
Extended Style(with Label) to add the Label "Name" to create the Name field. A database(account_info.xdb) will be created in EXPO for this form. Use the DB
link button to link to the database. In Expo, you can use the fullname field to retrieve the data. Create Entry fields for SS/ID, Date of Birth and Notes/Marks.
Check Multiline for Notes/Marks field. Change the Data type to Long Integer for Height, Feet, and Weight fields to accept only integer number input.
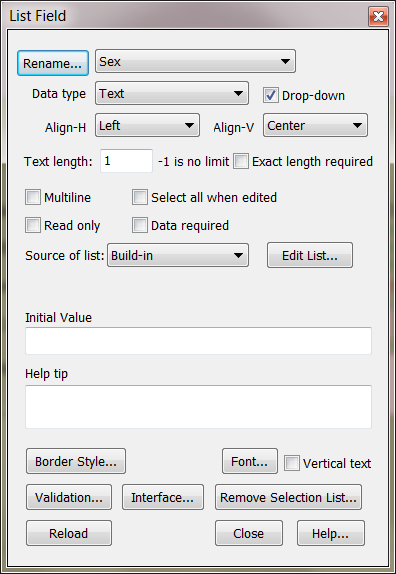
List Field
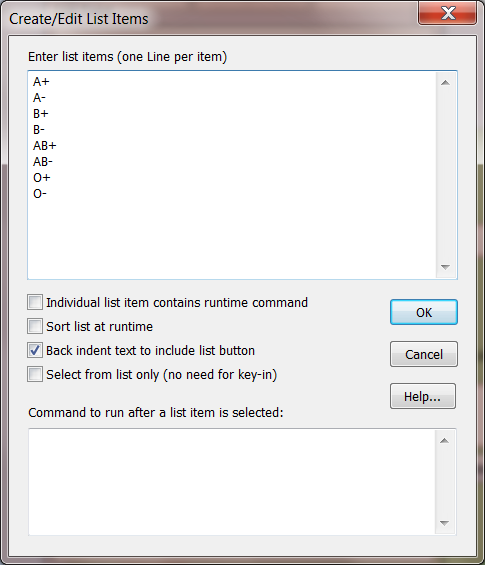
Use List Field object to create Gender, Blood Type, Eye Color and Hair Color fields. Select Edit List... button to open the Create/Edit List Items and enter the
item one line per item; F,M for Gender; A+,A-,B+,B-,AB+,AB-,O+,O- for Blood Type; Blue,Brown,Gray,Green,Hazel,Violet,Other for Eye Color and Black,Blond,
Brown,Red,Silver,White,Other for Hair Color. In Expo, these items will be available to drop down and select in these fields. You can also use List Source
Editor to create a .dat file and keep all list topics and items in one file. See Using Text file in List Field.
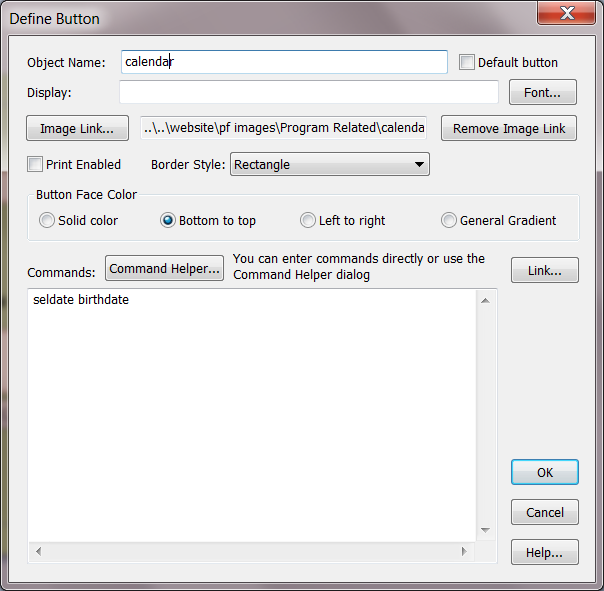
Button
Use Button object
to open the Define Button dialog box. Use image Link button to select the image file
to display. This image is created using
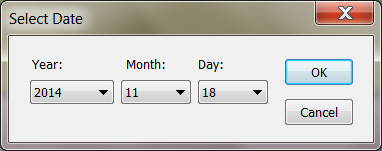
PageFocus object tools and Export/Save as calendar.ico. Enter "seldate birthdate" in the Commands window. In Expo, click this button will open select date
dialog box to select a date to put into birthdate field.
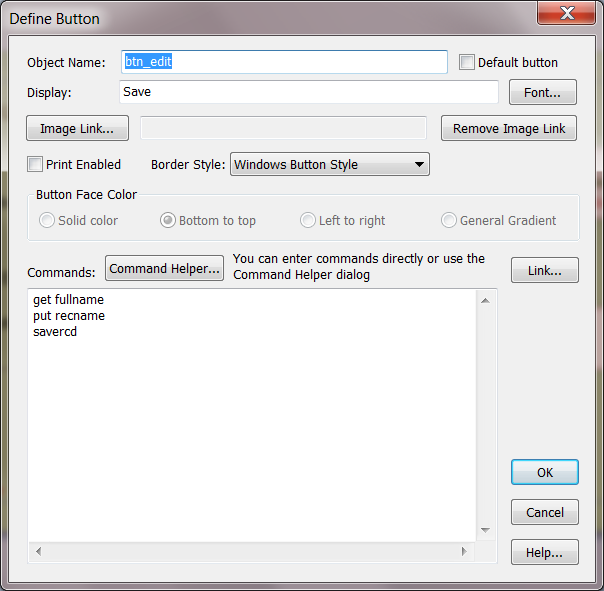
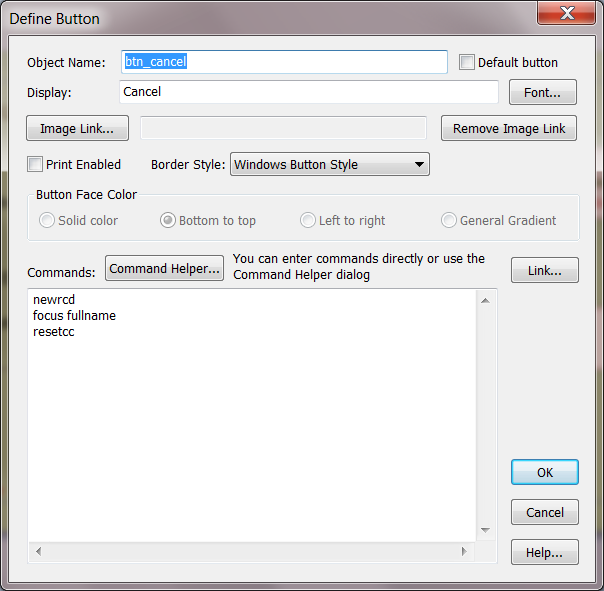
Use Button object to create the Save and Cancel buttons. Use the Color Tool Bar
to set the Text, Frame and Fill Colors of the buttons.
Commands to get fullname, put recname, savercd will be executed in EXPO when the Save button is selected. Fullname will be the record name in the Save
As dialog box .
Use Entry Field object to create a recname object to utilize automation of record name. This is the hide/no print field
in the bottom of the form.
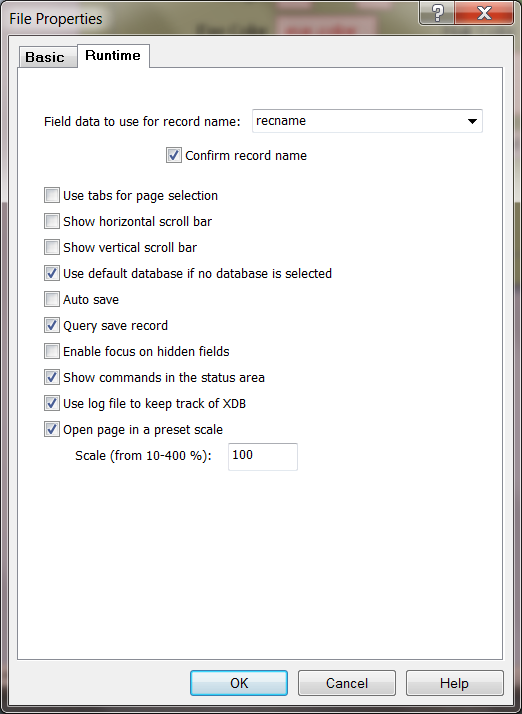
Choose File/Properties to open the File Properties dialog box. Select Runtime tab and choose recname for record name field. Check Confirm record name if
you want confirmation before saving the filename in EXPO.


Home > Applications > Data Entry Objects


Creative Stars, Inc.
© 2015 Creative Stars
Save
Cancel